DIY Tile Problems: The Layout

on Friday, February 4, 2011

One thing that can really ruin a tile job is a layout that looks awkward.  Starting with a full tile in one corner and going from there is not the way to go.  Finding and maintaining a centerline is very important if the room is square and finding an appealing layout in an awkward room is even more important.  It is a good idea to stretch a string line and leave it there for as long as you can to make sure you stay on your layout line. 

Remember, the centerline between the two walls may not be the center of what someone sees once a vanity is installed.  It is always recommended to get your tiles under any cabinetry – especially in the kitchen.  Building up your floor while leaving your cabinets where they are may result with not enough vertical clearance to reinstall your dishwasher.  

 Also, be sure you find the layout that will leave you with the largest piece possible against a transition strip, tub or any other area that tile stops but there is still foot traffic.  Smaller strips of tile are much more likely to pop up from use than larger pieces because there is less thinset to hold it down.  Cracking grout is the first sign of tile movement.

When in doubt, especially if you've never done it before, take the time to do a dry run.  Lay some of the tile pieces down along your layout lines to check where the tiles end.  Now you can check the look in any areas that may have given you problems and adjust accordingly.   I wouldn't really recommend doing any cuts yet, but that way you can shift your layout lines to fine tune the best tile layout.  It will take more time of course, but you will have a better idea that you've done it correctly if you do a dry run first.

IMPORTANT: Make sure to account for the space for your grout joints in your calculations!

Proper layout is the foundation of making certain that your DIY tile job will not only be aesthetically appealing, but that it will last and look great for years to come.
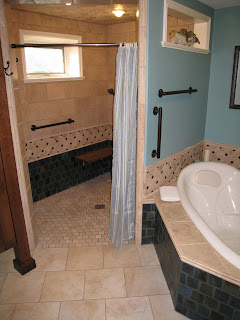
DIY Tile: The Homeowner's Favorite Project

on Thursday, January 27, 2011

In my experience, tile seems to be one of homeowner’s favorite weekend projects.  Sure it looks easy when you see it on TV, mix up mortar, set the tiles, grout and you’re done – right?  When it comes down to it, tiling requires a lot of work before you ever set a single tile and there are many things to consider when deciding to tackle this one on your own.

In the coming weeks, we will have several posts about DIY tile and what to avoid; there is simply too much to cover in one post.  Perhaps before we get into specific problems, I should make a quick note about the perils of tile problems.  The major risk with DIY tile is when something isn’t right, you often won’t know for some time, when major damage appears such as leaking water.  By then, your beautiful handiwork must be completely removed to allow for proper repair.

That being said, these problems can be avoided by keeping a few things in mind.  Planning is always key to any project and that includes the materials you are going to use.  It is very important, especially if you are ordering your tile, that you add 10% to the square footage you calculated to account for the waste attributed to cuts and layout challenges.  Imagine laying a beautiful tile floor and you just need 3 more to finish your bathroom but you run out of pieces and it takes 4-5 weeks to order more.  You can’t grout or continue until you’ve got that.  Then if the color variation is off in the new lot, those 3 tiles sitting right next to each other will stick out like a sore thumb.

This is easy enough to avoid, it just requires proper PLANNING, which is the foundation of a great DIY tile job.

In the next few posts we will visit layout, underlayment, grouting, and proper bonding.  Let me know your triumphs and tribulations on DIY tile jobs!